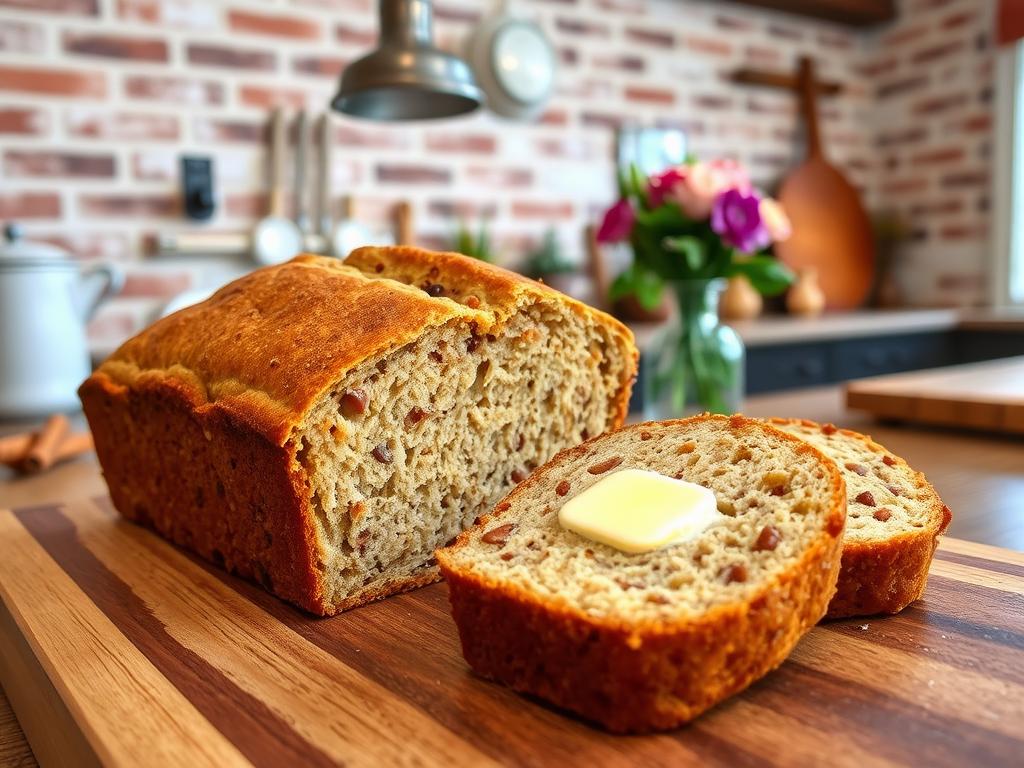
Easy Homemade Banana Bread Recipe
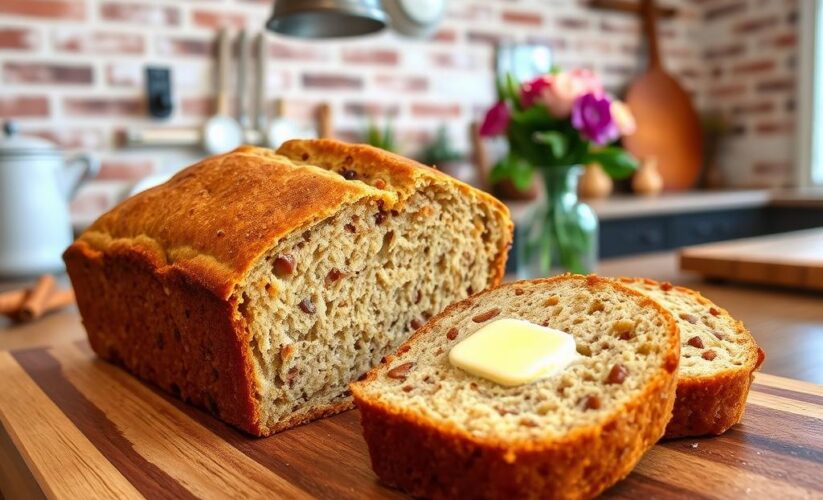
Turning overripe bananas into a golden loaf is magical. Our recipe has won thousands of 5-star reviews. It’s known for its perfect balance between simplicity and flavor. It’s great for both new and experienced bakers, offering moist, tender crumb without needing fancy tools.
Our recipe is a result of insights from pros and home cooks. It uses deeply ripe bananas and a special brown sugar-butter mix for caramelized edges. Prep takes just 10 minutes before baking.
This recipe is perfect for real life. It doesn’t need rare ingredients or hard steps. We’ll guide you through each step, from mashing to checking if it’s done. We’ve also included substitutions for different diets, so everyone can enjoy a slice.
Key Takeaways
- Overripe bananas create superior flavor and moisture
- Requires only 10 minutes of hands-on preparation
- Uses common pantry staples with flexible substitutions
- Brown sugar creates caramelized edges and rich depth
- Tested techniques ensure consistent results
- Family-friendly recipe with optional add-in variations
Essential Ingredients for Perfect Banana Bread
Great banana bread starts with the right ingredients. Each one is key to making the bread moist and flavorful. Let’s explore what you need and why it’s important.
Dry Ingredients Breakdown
Flour Types and Measurement Tips
All-purpose flour is best for most recipes. It gives the bread structure without making it dense. For gluten-free options:
- Use 1:1 gluten-free flour blends
- Add ½ tsp xanthan gum per cup of flour
Always measure flour the spoon and level way:
1. Fluff flour with fork
2. Spoon into measuring cup
3. Level with knife edge
Leavening Agents and Spices
Baking soda needs acidic ingredients to work. Baking powder works on its own. For best results:
- Use 1 tsp baking soda per 3 bananas
- Combine with ½ tsp baking powder
Cinnamon and nutmeg add flavor without overpowering. Start with 1 tsp cinnamon and ¼ tsp nutmeg, then adjust to taste.
Wet Ingredients Essentials
Banana Quantity and Ripeness Levels
Three medium bananas (about 1 cup mashed) are perfect for moisture and sweetness. Look for:
| Ripeness Level | Skin Color | Flavor Impact |
|---|---|---|
| Perfect | Speckled brown | Maximum sweetness |
| Underripe | Mostly yellow | Mild flavor |
| Overripe | Black spots | Intense banana taste |
To speed up ripening, place bananas in a paper bag with an apple overnight.
Egg and Fat Selection Guide
Use room-temperature eggs for better mixing. For fats:
- Oil creates moist texture
- Butter adds rich flavor
- Greek yogurt (½ cup) reduces calories
Combine fats for balanced results. Try ¼ cup oil + ¼ cup melted butter. This keeps the bread moist and enhances flavor.
Tools and Equipment You’ll Need
Your banana bread journey starts with these essential kitchen tools. You don’t need top-notch equipment, but the right basics are key for great results. We’ll look at what beginners need and how to improve your tools over time.

Must-Have Baking Tools
Mixing Bowls and Measuring Devices
Begin with two mixing bowls: one for dry ingredients and another for wet. Stainless steel bowls are great because they’re light and strong. For measuring, use nested cups for dry ingredients and a glass liquid measuring cup. A digital scale (under $20 at most stores) helps with flour measurements.
Baking Pan Selection Guide
Choosing the right pan is important:
| Pan Type | Heat Conductivity | Browning | Cost |
|---|---|---|---|
| Metal Loaf Pan | High | Crispy edges | $8-$15 |
| Glass Loaf Pan | Medium | Even baking | $12-$20 |
Metal pans are best for classic banana bread. Glass pans are great for slower bakes. If you prefer muffins, muffin tins are perfect for banana muffin recipe portions!
Optional Helpful Gadgets
Stand Mixer vs Hand Mixing
A stand mixer saves time, but hand mixing gives you more control:
| Method | Effort Level | Ideal For |
|---|---|---|
| Stand Mixer | Low | Large batches |
| Hand Mixing | Medium | Texture control |
Beginners can get great results with a $10 silicone spatula and whisk set.
Specialty Baking Accessories
Think about these upgrades as you get better:
- Oven thermometer ($7) for accurate temperatures
- Loaf pan liner ($5) for easy removal
- Cookie scoop ($12) for pancake recipe batter portioning
Preparing Your Bananas: Ripeness Matters
The secret to moist, flavorful banana bread is using fruit at its peak ripeness. You can bake with yellow bananas, but the magic happens when they turn brown. Let’s explore how to identify and achieve the perfect texture for your recipe.

Spotting Banana Perfection
Bananas change a lot as they ripen, affecting flavor and calories. Here’s what to look for:
Visual and Texture Indicators
| Stage | Color | Texture | Calories* |
|---|---|---|---|
| Underripe | Green tips | Firm, starchy | 89 |
| Perfect | Yellow with brown speckles | Soft but holds shape | 105 |
| Overripe | Mostly brown | Mushy, liquidy | 121 |
*Calories per medium banana (Source: USDA). The starch-to-sugar conversion explains the increase.
Banana Ripening Timeline
At room temperature (68°F):
- Day 1-3: Green to yellow
- Day 4-5: Speckles appear
- Day 6-7: Fully brown
When Time Is Short: Ripening Hacks
Need ripe bananas fast? Try these proven methods:
Overnight Paper Bag Method
- Place bananas in a brown paper bag
- Add an apple or tomato
- Fold the top closed
- Check in 12-18 hours
15-Minute Oven Hack
Perfect for last-minute baking:
- Preheat oven to 300°F (275°F for convection)
- Place unpeeled bananas on baking sheet
- Bake until skins blacken (12-18 minutes)
- Cool before mashing
Pet parents note: While bananas are safe for dogs, limit portions to 2-3 small slices. The high sugar content can upset sensitive stomachs.
Step-by-Step Mixing Instructions
Learning to mix well is key to making moist, tender banana bread. Unlike casseroles or puddings, banana bread needs a gentle touch. We’ll guide you through each step, and yes, we’ll talk about keeping batter away from dogs.

Combining Dry Ingredients
Sifting and Aerating Flour
Begin by sifting flour into a big bowl. This step removes lumps and adds air for a lighter texture. Use a whisk to mix:
- All-purpose flour
- Baking soda
- Salt
Proper Spice Integration
Add cinnamon or nutmeg to the dry mix. For even mixing:
- Place spices in palm
- Rub fingers through powder
- Sprinkle while whisking
| Technique | Banana Bread | Green Bean Casserole |
|---|---|---|
| Mixing Tool | Whisk | Spatula |
| Texture Goal | Airy | Dense |
| Spice Method | Pre-blend | Layering |
Creating the Wet Mixture
Mashing Bananas Perfectly
Use very ripe bananas for their natural sweetness. Mash them with a fork until smooth but still chunky. Pro tip: Chocolate chips are toxic to dogs, even if bananas are safe!
Emulsifying Eggs and Fat
Whisk eggs well before adding melted butter or oil. This creates a stable base, like pudding. The mix should flow smoothly off your whisk.
Final Batter Preparation
Folding Techniques Explained
Add dry ingredients to wet in three parts. Use a spatula to scoop from bottom and fold over top. This method keeps air bubbles in better than stirring.
Avoiding Overmixing Pitfalls
Stop folding when flour streaks are still visible. Overmixing can make the bread tough. Your batter should look a bit rough, not smooth.
Baking Your Banana Bread to Perfection
Turning your banana bread batter into golden perfection needs precision. It’s like a banana republic factory assembly line where every step is crucial. We’ll cover oven prep and timing to get that perfect crackly top.

Mastering Oven Readiness
Having consistent heat is key. Here’s how to make your kitchen like a bakery:
Temperature Calibration Tips
Ovens can be off. Use an oven thermometer to check if yours is right. Commercial bakers suggest putting an insulated baking sheet on the lower rack to keep temperatures steady, just like in factory production consistency.
Pan Greasing Showdown
Choosing the right pan is important:
| Method | Best For | Release Success |
|---|---|---|
| Butter + Flour | Classic texture | 95% |
| Parchment Paper | Easy cleanup | 100% |
| Cooking Spray | Quick prep | 90% |
“Southern bakers say: If banana spiders are in your kitchen, don’t open the oven too much. Their webs like warm spots, but your bread needs steady heat!”
Timing Is Everything
Baking time varies. Consider these factors:
Standard Baking Duration
Most loaves bake for 55-65 minutes at 350°F. Try Source 1’s trick: Put an empty pan below your bread pan to avoid burnt bottoms.
Altitude Adjustments Guide
- 3,000-5,000 ft: Reduce baking powder by 1/8 tsp
- 5,000-7,000 ft: Increase temp to 375°F, bake 15% less time
- 7,000+ ft: Use 25% less leavening agent
Bakers in Savannah bananas areas often bake 5 extra minutes because of the humidity. Look for these signs:
- Edges pulling from pan sides
- Deep golden-brown crown
- Toothpick with moist crumbs (not wet batter)
Testing Doneness: How to Avoid Undercooking
There’s nothing quite like pulling a perfectly baked banana bread from the oven. But, avoiding a raw center is key. We’ll explore ways to ensure your loaf cooks evenly every time. Think of this as your kitchen detective kit, combining visual clues with hands-on tests for guaranteed success.

Visual Inspection Methods
Your eyes are the first tool in the doneness toolkit. Start by examining the bread’s surface about 5 minutes before the recipe’s suggested bake time ends.
Crack Formation Analysis
Look for cracks resembling banana pepper ribs – deep enough to peek into but not gaping open. Proper cracks should:
- Run lengthwise along the loaf’s center
- Show light browning on the edges
- Reveal cooked crumbs (not shiny batter) inside
Color Development Stages
A golden-brown crust signals doneness, while pale yellow suggests undercooking. Watch for these color cues:
“The perfect loaf transitions from buttery yellow to rich caramel – like banana pudding’s golden cousin. If it looks more vanilla than honey, give it more time.”
Physical Testing Techniques
When visual checks leave you uncertain, these tactile methods provide concrete answers.
Toothpick Test Variations
While the classic toothpick works, try these alternatives for precision:
| Tool | Clean Result | Undercooked Sign |
|---|---|---|
| Metal skewer | Warm, dry | Sticky residue |
| Butter knife | Few crumbs | Wet batter |
| Wooden chopstick | Slight grain marks | Glossy coating |
Finger Spring-Back Method
Press the center gently with a fingertip – properly baked bread springs back completely, leaving no dent. Pro tip: Use the focus of a Banana Republic tailor inspecting seams. If indentation remains, bake 3-5 more minutes and retest.
Cooling and Slicing Techniques

Your banana bread’s journey isn’t over when it leaves the oven. How you handle cooling and slicing impacts its texture, moisture retention, and even banana calories preservation. Let’s ensure your loaf stays delicious from countertop to plate.
Proper Cooling Procedures
Cooling isn’t just waiting—it’s active moisture management. Follow these steps to lock in freshness:
Wire rack positioning
Immediately transfer your loaf from the pan to a wire rack. This simple step prevents soggy bottoms by allowing air circulation. For budget-friendly racks, check Banana Republic Outlet home sections—they often have kitchen essentials at great prices.
Steam release management
Leave the bread slightly elevated on one edge using a folded kitchen towel. This creates space for steam to escape without drying out the crumb. Proper steam management helps retain nutrients like natural banana calories while preventing mushiness.
Professional Slicing Methods
Cutting technique separates haphazard breaks from bakery-worthy slices. Here’s how the pros do it:
Serrated knife selection
Use a 10-inch serrated knife with pointed tips. The saw-like edge glides through the crust without compressing soft interiors. Think of the precision used by the Savannah Bananas baseball team—their exacting standards translate perfectly to kitchen tasks.
Warm vs cooled slicing
Resist cutting warm bread unless you want rustic, crumbly pieces. For clean slices:
- Wait 2 hours for complete cooling
- Wipe knife between cuts
- Use gentle back-and-forth motions
Serving Suggestions and Pairings
Your banana bread deserves more than just a plain plate! Let’s explore ways to make every slice special. Whether you’re hosting brunch or just want dessert, these ideas are perfect. They work for both classic loaves and banana muffin recipe versions.
Breakfast Enhancements
Toasting and topping ideas
Give day-old slices a new life with these quick tips:
| Topping Style | Ingredients | Prep Time |
|---|---|---|
| Honey Butter Bliss | Whipped butter + local honey | 2 minutes |
| Muffin-Inspired Crunch | Crumbled walnuts + brown sugar | 3 minutes |
| Tropical Twist | Toasted coconut + mango slices | 4 minutes |
Beverage pairing suggestions
Pair warm banana bread with:
- Cold brew coffee (balances sweetness)
- Chai latte (adds spice notes)
- Almond milk smoothies (for protein boost)
Dessert Transformations
À la mode presentations
Heat slices in a skillet until edges caramelize. Serve with:
- Vanilla bean ice cream
- SaltED caramel gelato
- Banana pudding layered between slices
Sauce drizzling options
Create a Banana Bread Bar with these sauces:
- Melted dark chocolate (keep dog-safe versions separate)
- Bourbon caramel sauce
- Greek yogurt glaze (1 cup yogurt + 2 tbsp honey)
“Always set aside plain portions for furry friends – peanut butter makes a safer topping than chocolate!”
Storing and Freezing for Freshness
Keeping your banana bread moist is key. Whether you’re enjoying it for a few days or freezing it, these tips help. They ensure every slice stays fresh. Let’s look at how to keep your loaf from getting stale.
Room Temperature Storage
For short-term freshness, store your banana bread at room temperature. Follow these simple steps:
Proper wrapping techniques
Wrap it like a gift: Start with plastic wrap, then cover with aluminum foil. This double-layer method keeps your bread fresh. It’s like a factory seal for your home.
- Prevent air exposure
- Lock in moisture
- Maintain soft texture
Humidity control methods
Keep moisture balanced by using a folded paper towel inside the container. Change it daily. This absorbs excess humidity without drying out the bread.
Long-Term Freezing Solutions
Freeze banana bread for up to 3 months with these tips:
Slice-by-slice preservation
Freeze slices separately with parchment paper in between. It’s like making individual portions. This way, you can:
- Thaw only what you need
- Prevent freezer burn
- Save storage space
Thawing best practices
Thaw frozen bread in the fridge overnight or quickly on the counter. For fast cravings, microwave a slice for 10 seconds wrapped in a damp towel.
Reviving Stale Banana Bread
Don’t throw away stale bread! Try these tricks:
Oven refreshment method
1. Preheat oven to 300°F
2. Sprinkle bread with water
3. Wrap in foil and bake 10 minutes
Microwave quick fixes
Place a cup of water beside the bread in the microwave. Heat on high for 15-second intervals until softened. It’s like a banana spider’s web – gentle but effective!
Pro tip: Turn stale leftovers into bread pudding or blend into a pancake recipe batter. It’s a zero-waste breakfast solution.
Conclusion
This easy banana bread recipe shows baking can be simple. You can make homemade banana bread fit your life. Try using gluten-free flour or vegan alternatives for different tastes.
Every overripe banana is a chance to make something delicious. We’ve covered the basics to help you succeed. Whether it’s for breakfast or dessert, this recipe is versatile.
Don’t throw away those bananas. With this guide, you can make moist, delicious loaves. Bake it your way and enjoy the smiles it brings.